How to Fix a Leaky Faucet at Home
DIY Plumbing Solutions: Fix Your Leaky Faucet Today!
Introduction to Fixing a Leaky Faucet
Leaky faucets are a common household issue that can waste water and increase your utility bills if left unattended. Before diving into the repair process, it's important to understand why your faucet might be leaking and the urgency of addressing these issues.
Understanding the Common Causes of Faucet Leaks
Faucet leaks can be caused by a variety of factors, including worn-out O-rings, damaged washers, or even mineral buildup inside the faucet. Identifying the exact cause will help you pinpoint the necessary repairs.
The Importance of Addressing Leaks Promptly
Ignoring a leaky faucet can lead to more significant plumbing issues over time. Not only does it waste water, but it can also cause damage to surrounding fixtures and surfaces. By fixing the leak early, you can save money and prevent further problems.
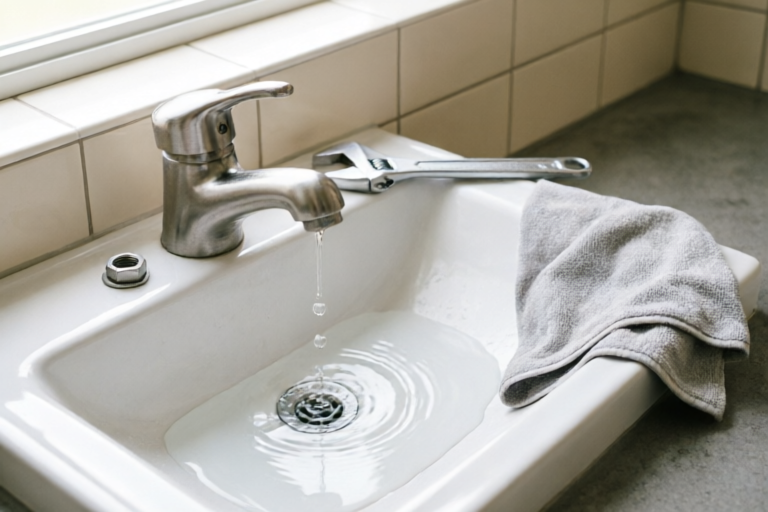
Tools and Materials Needed for Basic Repairs
- Adjustable wrench
- Screwdriver
- Replacement parts (O-rings, washers, etc.)
- Plumber’s tape
- Towels or buckets to catch drips
Identifying the Type of Faucet
Before starting any repairs, it's essential to identify the type of faucet you're dealing with. This will determine the specific tools and techniques required for the repair.
Differentiating Between Compression, Ball, Cartridge, and Ceramic-Disk Faucets
There are several types of faucets, each with its own unique design and repair requirements:
- Compression Faucets: These older models have separate hot and cold handles that control the flow of water through a valve mechanism.
- Ball Faucets: Known for their rotating ball inside the faucet body that controls both water flow and temperature.
- Cartridge Faucets: Featuring a single cartridge that controls water flow and temperature.
- Ceramic-Disk Faucets: Utilizing ceramic disks that rotate to control water flow and temperature.
Steps to Identify Your Specific Faucet Type
To identify your faucet type, look at the handles and the overall design. If you have two separate handles for hot and cold water, it's likely a compression faucet. A single handle that rotates and moves up and down suggests either a ball or cartridge faucet. Ceramic-disk faucets typically have sleek, modern designs with minimal moving parts.
Why Knowing Your Faucet Type Is Crucial for Repair
Knowing the type of faucet you have ensures you use the correct tools and replacement parts. Each type has different internal components, so using the wrong parts could result in a failed repair or even further damage.
Preparing for the Repair
Before you start disassembling your faucet, make sure you've prepared everything you'll need for the job. This includes turning off the water supply, placing towels or buckets to catch drips, and removing the handle and stem assembly.
Turning Off Water Supply to the Faucet
Locate the shut-off valves under the sink and turn them clockwise to close the water supply. If there are no visible shut-off valves, you may need to turn off the main water supply to the house.
Placing Towels or Buckets to Catch Drips
Place towels or buckets under the faucet to catch any remaining water as you work. This helps prevent water from spilling onto the floor and causing damage.
Removing the Handle and Stem Assembly
Use an appropriate screwdriver to remove the screws securing the handle to the stem assembly. Once the screws are removed, gently pull the handle away from the stem. You may need to apply some force if the handle is stuck.
Locating and Replacing Faulty Parts
With the faucet disassembled, inspect the internal components for wear or damage. Common parts that cause leaks include O-rings, washers, and seals. Replace any worn or damaged parts to ensure a proper seal.
Inspecting the Internal Components for Wear or Damage
Use a flashlight to inspect the internal components. Look for signs of wear, such as frayed O-rings or cracked washers. Pay special attention to the areas where water is leaking.
Common Parts That Cause Leaks (O-rings, Washers, Etc.)
- O-rings: These rubber rings create a watertight seal around the stem. Over time, they can become brittle or misshapen.
- Washers: Located at the base of the stem, these flat rubber disks can wear out and allow water to seep through.
- Seals: Any other rubber or plastic components that may be damaged or worn out.
Step-by-Step Guide on Replacing Faulty Parts
- Remove the old O-ring or washer by gently pulling it out.
- Measure the diameter and thickness of the old part to ensure you get an exact replacement.
- Apply plumber’s tape to the threads of the new part to create a better seal.
- Install the new O-ring or washer and reassemble the faucet.
Reassembling the Faucet and Testing
After replacing the faulty parts, it's time to put everything back together and test the faucet to ensure the leak is fixed.
Properly Reattaching the Handle and Stem Assembly
Align the stem assembly with the handle and secure it with the screws you removed earlier. Make sure the handle is properly aligned with the faucet body.
Turning the Water Supply Back On
Once everything is reassembled, turn the water supply back on by opening the shut-off valves. Allow the water to run for a few seconds to clear any air pockets.
Checking for Leaks After Reassembly
Turn the faucet on and check for any leaks. If you notice water dripping or pooling, turn off the water supply again and double-check the seals and connections.
Conclusion and Maintenance Tips
Fixing a leaky faucet can be a straightforward process if you follow the right steps. By understanding the common causes of leaks and the importance of prompt repairs, you can save money and prevent further damage.
Summary of Key Steps in Fixing a Leaky Faucet
- Identify the type of faucet.
- Turn off the water supply and prepare for the repair.
- Disassemble the faucet and inspect for faulty parts.
- Replace worn or damaged O-rings, washers, or seals.
- Reassemble the faucet and test for leaks.
Preventative Maintenance Tips to Avoid Future Leaks
- Periodically check for signs of wear or damage in your faucet.
- Use plumber’s tape when tightening connections to prevent leaks.
- Avoid over-tightening screws or handles to prevent damage.
When to Call a Professional Plumber
If you're unable to locate the source of the leak or if the repair process becomes too complex, it's best to call a professional plumber. They have the expertise and tools to diagnose and fix even the most stubborn leaks.
Comments

Followed all steps but still leaking. Time to call a pro?

I turned off the water but still got a little mess. Maybe I need better towels?

This helped a ton! My ceramic-disk faucet had a tiny leak. Replaced the O-ring and no more drip.

Good tips, but don't forget to check for mineral buildup around the aerator too. It can cause leaks.

Thanks for this! I have a ball faucet. Any advice on which part usually goes bad first?

Great guide! I followed these steps and it worked perfectly. Saved me a lot of money on a plumber.
Same issue here. My compression faucet was leaking like crazy. Replaced the washers and it's fixed!