Troubleshooting & Fixes
How to Fix Slow Computer Performance Issues Quickly
Boost Your Speed, Own Your Time
## 1. Introduction: Understanding Common Causes of Lag
Few things are more frustrating than staring at a blinking cursor while your computer attempts to load a simple webpage. You click, you wait, and perhaps the screen freezes completely. In today’s digital-first world, a slow computer isn’t just an inconvenience; it is a direct impediment to productivity, creativity, and peace of mind. Over time, even the most powerful machines succumb to the gradual accumulation of digital clutter, leading to noticeable lag, slower boot times, and frequent application crashes.
This comprehensive guide is designed to help you diagnose and resolve these sluggish performance issues quickly. We will demystify the technical reasons behind computer slowdowns and provide actionable, step-by-step solutions that you can implement immediately without needing to be a technical expert. Our goal is to restore your machine to its peak potential, extending its lifespan and improving your overall user experience.
### Overview of Why Computers Slow Down Over Time
It is natural to assume that a computer bought today should run indefinitely with the same efficiency. However, several factors contribute to performance degradation:
1. **Bloatware and Software Accumulation:** As years pass, more applications are installed. Many of these leave behind residual files, registry entries, and background services that continue to consume resources even after the program is technically closed or deleted.
2. **Operating System Updates:** While updates patch security vulnerabilities, they also introduce new features that may require more processing power than older hardware can efficiently handle, particularly on devices aged five years or more.
3. **Malware and Spyware:** Unwanted software can hide in the background, mining cryptocurrencies or gathering data, which silently hogs CPU and bandwidth.
4. **Storage Saturation:** Hard drives and solid-state drives (SSDs) perform poorly when they are nearly full. Operating systems need free space to swap data temporarily (virtual memory) and organize files efficiently.
5. **Driver Conflicts:** Outdated or corrupted device drivers prevent hardware components from communicating effectively with the operating system, causing stuttering and freezing.
### Setting Realistic Expectations for Quick Improvements
Before we begin, it is important to set realistic expectations. This guide focuses on software-based optimizations that yield immediate, tangible improvements in responsiveness. These steps will clear the "digital dust" clogging your system. However, software fixes have limitations. If your hardware itself is outdated (for instance, using a mechanical hard drive instead of an SSD, or having less than 4GB of RAM), these software tweaks can only stretch performance so far. Eventually, hardware upgrades like adding RAM or switching to an SSD become necessary. With that said, the majority of users experiencing lag can see a significant turnaround simply by following the protocols outlined below. Let us dive into the solution.
## 2. Step 1: Manage Background Processes and Applications
The number one culprit for a sudden slowdown in Windows computers is often excessive activity running in the background. These are applications that do not occupy your active workspace but constantly consume Central Processing Unit (CPU) cycles and Random Access Memory (RAM).
### How to Use Task Manager to Identify High-Resource Programs
To take control of your system, you must first see what is actually happening under the hood. The built-in Windows Task Manager is your primary tool for this inspection.
**Accessing Task Manager:**
Press the combination `Ctrl + Shift + Esc` simultaneously on your keyboard. Alternatively, right-click the Taskbar and select "Task Manager." If the window opens in a compact view, click "More details" at the bottom to see the full dashboard.
**Analyzing Performance Data:**
Click on the "Processes" tab. Here, you will see a list sorted by resource usage. Look specifically at three columns: CPU, Memory, and Disk.
1. **CPU Usage:** If a non-essential program (like a browser, game launcher, or social media app) is consistently using more than 20-30% of your CPU while idle, it is likely misbehaving. Normal background tasks should hover near 1-5%.
2. **Memory (RAM):** If your memory usage is above 80% with only a few programs open, you are out of headroom. Close any unused tabs or applications listed here.
3. **Disk Usage:** If the Disk column reads "100%", this indicates your storage drive is overwhelmed. This is a critical bottleneck that affects everything from boot speed to opening documents.
### Closing Unnecessary Tasks
Once you have identified the resource-heavy applications:
1. Select the problematic program in the list.
2. Click the "End Task" button located at the bottom right of the window.
**Caution:** Avoid ending tasks named with generic terms like "svchost.exe" or anything labeled under "Windows Services" unless you are certain of their function, as terminating them may cause system instability. Stick to closing known user applications like Chrome, Spotify, or Steam.
For recurring issues, consider using third-party lightweight alternatives to Task Manager like "Microsoft Sysinternals Autoruns" which offers deeper visibility into service-level processes, though the native Task Manager suffices for 90% of home user scenarios.
## 3. Step 2: Perform Disk Cleanup and Free Up Storage
Just as a room feels stuffy when packed with boxes, a hard drive slows down when crammed with data. Operating systems and applications generate temporary files, error logs, and cached images that are rarely useful but take up valuable megabytes and gigabytes over months of usage.
### Techniques to Remove Temporary Files and Cache
Windows includes a dedicated utility for this exact purpose: Disk Cleanup.
**Manual Disk Cleanup:**
1. Press the `Windows Key`, type "Disk Cleanup," and press Enter.
2. Select the drive you wish to clean (usually C:) and click OK.
3. The system will calculate how much space can be freed. Once the list appears, check the boxes next to items like "Temporary Internet Files," "Thumbnails," "Recycle Bin," and "System Error Memory Dump Files."
4. Click "OK" followed by "Delete Files."
**Clean Up System Files:**
To remove even more bulk, such as old Windows Updates that are no longer needed:
1. Inside the Disk Cleanup window, click the button labeled "Clean up system files."
2. Re-select your drive.
3. Look for "Windows Update Cleanup" or "Previous Windows Installation(s)." These can sometimes reclaim several gigabytes of space on a single click. Ensure "Downloaded Program Files" and "Offline Windows Update Packages" are also selected.
### Utilizing Storage Sense
For a proactive approach, modern Windows versions (10 and 11) feature "Storage Sense." This automated feature manages your disk space without manual intervention.
1. Go to Settings > System > Storage.
2. Toggle "Storage Sense" to On.
3. Click "Configure Storage Sense or run it now."
4. Set it to run when low on space or monthly. Enable the option to delete temporary files that apps aren’t using and automatically empty the Recycle Bin after 30 days.
By ensuring you always maintain at least 15-20% free space on your drive, you allow the file system to allocate fragments efficiently, drastically reducing read/write latency.
## 4. Step 3: Adjust Startup Programs and Power Settings
Every time you turn on your computer, a cascade of applications launches to prepare the system for use. Many of these are unnecessary. Similarly, power settings determine how aggressively your computer uses energy, which directly correlates to its available speed.
### Disabling Unnecessary Boot Applications
Too many programs starting up simultaneously delays your desktop login. To fix this:
1. Open Task Manager (`Ctrl + Shift + Esc`).
2. Navigate to the "Startup" tab.
3. Review the list of enabled apps. Look for entries like "Skype," "Spotify," "Adobe Reader," or "Steam Launcher."
4. Right-click on applications you do not need immediately upon booting.
5. Select "Disable." Note that "Status" will change to "Disabled." Do not disable audio drivers, antivirus, or touchpad utilities.
Disabling these allows your CPU to focus on loading the essential OS environment rather than dozens of redundant background processes, cutting boot time by seconds or even minutes depending on the number of offenders.
### Optimizing Energy Modes for Better Responsiveness
Laptops especially are prone to power-saving restrictions that throttle performance to extend battery life. On desktops, incorrect settings can also limit peak output.
**For Laptops:**
While traveling, battery saver mode makes sense. However, when plugged in for work or gaming, you want full performance.
1. Click the Battery Icon in the system tray.
2. Set the slider to "Best Performance."
3. If you have manufacturer-specific software (like Lenovo Vantage or ASUS Armoury Crate), ensure the profile is set to "Turbo" or "High Performance" mode.
**For Desktops:**
1. Open the Control Panel and search for "Power Options."
2. Select "High Performance" from the plan list. This prevents the CPU from downclocking its speed when idle loads occur, reducing micro-stutters during web browsing or document editing.
Additionally, disable "Hibernate" if you are a heavy user who prefers fast reboots, as hibernation files can clutter disk space unnecessarily if not utilized.
## 5. Step 4: Update Drivers and Run Security Scans
Outdated drivers are silent killers of performance. Furthermore, malicious software often disguises itself as a legitimate process, masquerading as "Google Chrome" or "Windows Update" to trick you while draining your resources.
### Ensuring All Software Drivers Are Current
Hardware drivers act as the translators between your Operating System and your physical components (Graphics Card, Network Adapter, Sound Card). When these translations are faulty, inefficiency follows.
**Updating via Device Manager:**
1. Right-click the Start button and select "Device Manager."
2. Expand categories like "Display adapters," "Network adapters," and "Keyboards."
3. Right-click the device and select "Update driver."
4. Choose "Search automatically for updated driver software."
**Direct Manufacturer Updates:**
Sometimes Windows misses specific updates, particularly for GPUs. Visit the official NVIDIA, AMD, or Intel website to download the latest studio or game-ready drivers manually. This ensures compatibility with new software standards and patches known bugs that cause rendering stutters.
### Performing Deep Scans to Eliminate Malware
Viruses are frequently blamed for slow PCs because they create hidden processes. Even if you have an antivirus, a second opinion scan is vital.
1. **Windows Defender:** Built into Windows 10/11, run a "Full Scan" rather than a "Quick Scan." This checks every file on the hard drive. Go to Settings > Privacy & Security > Windows Security > Virus & threat protection > Check for threats.
2. **Third-Party Tools:** Download a reputable tool like Malwarebytes (the free version is sufficient). Run a scan and quarantine any detected threats. These tools are excellent at detecting adware and spyware that traditional antivirus engines sometimes miss.
3. **Browser Hygiene:** Often, the lag originates in the web browser. Check extensions. Disable or remove any extension you do not recognize. Browsers like Chrome store massive amounts of cache; try resetting the browser to default settings to wipe out corrupt profiles.
A clean system is a responsive system. By eliminating the parasitic elements consuming your cycles, you reclaim a portion of your hardware’s capacity for genuine work.
## 6. Conclusion: Long-Term Maintenance Strategies
Congratulations! You have just performed a major health check-up for your computer. By managing background processes, cleaning your storage, optimizing startup sequences, and securing your system, you have restored a significant amount of lost velocity. However, computer maintenance is not a one-time event; it is a habit.
### Summary of Key Actions Taken
To recap, the path to a faster PC involves:
* **Monitoring:** regularly checking Task Manager for spikes in CPU or Memory usage.
* **Cleaning:** weekly deletion of temp files and enabling Storage Sense.
* **Optimizing:** disabling unnecessary startup items to save boot time.
* **Securing:** keeping drivers updated and running periodic virus scans.
### Practical Tips to Maintain Optimal Performance in the Future
To ensure your computer stays fast for the long haul, adopt these preventative measures:
1. **Regular Reboots:** Don’t just sleep your computer. Shut down once a week to flush out lingering background processes and apply updates.
2. **Limit Installed Software:** Be mindful before installing new programs. Often, we install software we think we might need "one day." Only keep what you actively use.
3. **Backup Data:** As part of maintenance, utilize cloud storage or external drives for critical files. A healthy system backs up its own history.
4. **Monitor Hardware Health:** Every few months, listen to your fans. Excessive noise or heat can indicate cooling issues which lead to thermal throttling (speed reduction due to overheating). Dusting out vents with compressed air can solve this.
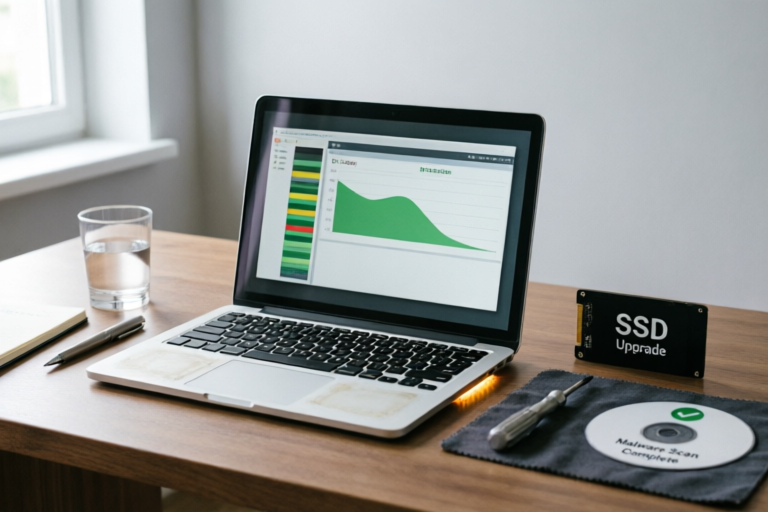
Finally, remember that technology evolves rapidly. If you have exhausted all software optimizations and the system remains sluggish, it is time to consult a professional regarding hardware upgrades. An upgrade to a Solid State Drive (SSD) remains the single most effective hardware modification for aging systems, offering boot speeds previously impossible with older hard drives. For now, however, the steps outlined in this guide empower you to tackle the issue yourself. By taking control of your digital environment, you ensure that your technology serves you, rather than the other way around. Go ahead and restart your machine to feel the difference immediately.
Comments

QuickFixer
worked! but had to restart twice to see the full effect.
👍 25👎 0

LazyAdmin
solid read. wish i'd seen this before i bought a gaming gpu, turns out software was the bottleneck.
👍 13👎 0

TechSupport_Helper
pro tip: type msconfig instead of digging around in task manager sometimes.
👍 0👎 0

DeskSetup_Dan
same issue at work. my boss says 'just get a new one' but this guide helped me buy more time lol.
👍 18👎 0

CodeNinja
step 4 is crucial. found a miner virus just doing the scan, definitely slowing things down before i knew it.
👍 12👎 0
Sarah_J
wait, does cleaning disk space delete anything important? i'm scared to lose photos.
👍 11👎 0

OldLaptopGuy
finally got rid of that spinning beach ball. disabled so many apps starting up, didn't even realize they were running.
👍 2👎 0