Tech & Software Questions
How to fix slow computer performance on Windows 10 effectively?
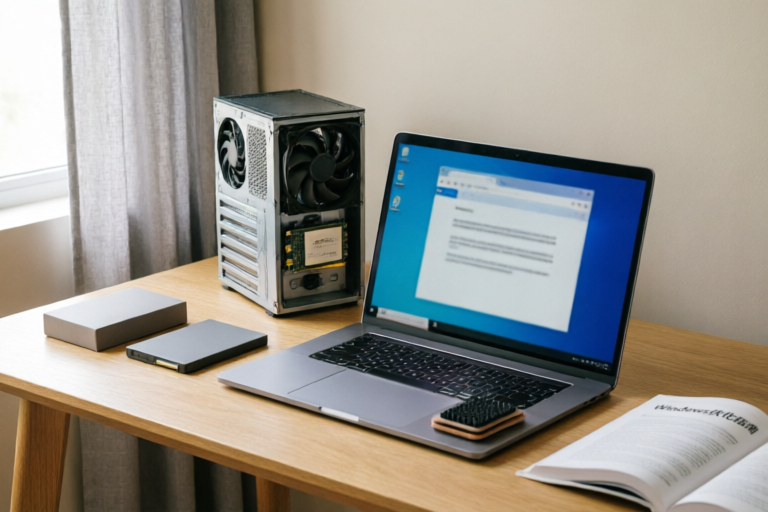
Revitalize Your Windows 10 Experience Today.
# How to Fix Slow Computer Performance on Windows 10 Effectively
## Introduction: Understanding Windows 10 Performance Issues
In today’s digital-first world, our computers are not just tools; they are gateways to our careers, education, entertainment, and communication. Consequently, when a Windows 10 machine begins to suffer from sluggish performance, the impact extends far beyond mere annoyance. You might find yourself staring at spinning loading circles, experiencing freezes during critical video calls, or enduring agonizingly long boot times that eat into your morning routine. But why does this happen, and more importantly, how do we fix it?
### The Anatomy of System Lag
Windows 10 is a robust operating system designed to handle complex tasks, resource management, and security protocols simultaneously. However, over time, its efficiency can degrade due to several common factors:
1. **Software Bloat:** Every application installed adds processes, background services, and startup entries. Even seemingly benign programs can consume significant CPU and RAM resources silently.
2. **Accumulated Data:** Temporary files, browser caches, fragmented drives, and system logs pile up over months or years of usage, clogging the system drive.
3. **Hardware Limitations:** Older hard disk drives (HDDs) struggle with modern applications compared to solid-state drives (SSDs). Insufficient RAM forces the system to swap data to the disk, causing severe latency.
4. **Outdated Drivers:** GPU drivers, chipset drivers, and peripheral firmware play a crucial role in smooth operation. Outdated drivers can lead to bottlenecks and instability.
5. **Malware Infections:** Malicious software often runs in the background, consuming bandwidth and processing power to mine cryptocurrency or send spam data.
### The Importance of Optimal Speed
Maintaining optimal speed is vital for productivity. Studies show that even a few seconds of delay can disrupt cognitive flow and increase stress levels. A responsive system allows for faster multitasking, smoother video playback, and more efficient file management. By taking proactive steps to optimize your system, you extend the lifespan of your hardware and ensure a seamless user experience without the immediate need for expensive replacements.
This comprehensive guide will walk you through advanced yet accessible methods to troubleshoot and enhance your Windows 10 environment, covering everything from basic cleanups to hardware recommendations.
---
## Disable Unnecessary Startup Applications
One of the most immediate ways to speed up your Windows 10 PC is by reducing the number of programs that launch automatically when you turn on your computer. Many users are unaware that installing software often defaults to “Run at Startup,” creating a bottleneck right at the moment you need your device most.
### Why Startup Apps Matter
When you press the power button, the operating system loads its core kernel and then attempts to initialize all registered startup items. If five different applications attempt to load simultaneously alongside the OS, it creates a resource contention issue. The processor cannot give each program immediate attention, leading to a delayed desktop appearance and initial lag.
### Step-by-Step Guide to Managing Boot Settings
Fortunately, Windows 10 provides a built-in tool specifically for this purpose, making third-party utilities unnecessary for basic management.
#### 1. Accessing the Task Manager
First, open the Task Manager. You can do this by pressing `Ctrl + Shift + Esc` on your keyboard or by right-clicking the Start button icon and selecting **Task Manager** from the context menu.
#### 2. Navigating to the Startup Tab
If the Task Manager opens in the simple view, click **More details** at the bottom left. Look for the **Startup** tab in the horizontal menu near the top. Here, you will see a list of all applications configured to run during login.
#### 3. Analyzing the Impact
The table displays columns for **Name**, **Publisher**, **Status** (Enabled/Disabled), and **Startup impact**. The "Startup impact" is color-coded (High, Medium, Low) to help you gauge how much an app consumes resources upon launching. Be wary of apps marked as "High" impact; these are prime candidates for disabling.
#### 4. Identifying Safe-to-Save Items
Before disabling anything, ask yourself: Do I need this running immediately? Common safe-to-disable entries include:
* **Cloud Sync Tools:** Dropbox or Google Drive usually have their own trays.
* **Communication Apps:** Skype, Discord, or Steam chat notifications.
* **Update Checkers:** iTunes updater, Adobe Reader update service.
* **Manufacturer Bloatware:** Pre-installed games or trial software from laptop manufacturers.
Items like antivirus software, audio drivers, and essential mouse/keyboard utilities should generally remain enabled.
#### 5. Executing the Disable Command
Click on the application you wish to stop and press the **Disable** button located on the bottom right. Once done, restart your computer to test the difference.
> **Pro Tip:** After disabling, keep an eye on your system stability for a week. If you notice issues with a specific function, return and re-enable the app. Sometimes, apps claim to be independent but require other services to function correctly.
By pruning this list, you can shave minutes off your boot time and significantly reduce background RAM usage during daily use.
---
## Clean Up Disk Space and Temporary Files
As your computer accumulates data, the storage drive fills up, leaving less room for the operating system to perform virtual memory swaps and temporary buffering. When a drive exceeds 80% capacity, performance degradation becomes inevitable. Cleaning up unused files restores breathing room for the OS.
### Using Built-In Windows Tools
Windows 10 includes powerful native tools that are safer and often more effective than third-party cleaners.
#### 1. Storage Sense: Automated Maintenance
Storage Sense is a modern feature introduced in Windows 10 (version 1709 and later) that automates cleaning tasks.
* **Enable Feature:** Go to **Settings > System > Storage**. Toggle the **Storage Sense** switch to **On**.
* **Configure Schedule:** Click on **Configure Storage Sense or run it now**. You can set it to remove temporary files every day, week, month, or when disk space is low.
* **Download Folders:** Enable **Clean up folders containing obsolete files**. This ensures downloads that haven’t been opened recently are purged after a set number of days.
This tool works silently in the background, preventing clutter from building up in the first place.
#### 2. Disk Cleanup Tool: Deep Dive
For a more aggressive manual clean, the classic Disk Cleanup utility is still highly effective.
* **Launch:** Type "Disk Cleanup" in the Start menu search bar and open it.
* **Select Drive:** Choose your main C: drive. Wait for the scan to finish calculating deletable files.
* **Review Categories:** You will see options like "Temporary Internet Files," "Windows Update Cleanup," "Recycle Bin," and "Thumbnails."
* **Important Note:** Always review "Previous Windows Installation(s)" (often labeled as `Windows.old`). If you recently upgraded Windows, this folder can take up 10-20 GB. Deleting it frees massive space but prevents rolling back to the previous version.
* **System Files:** For deeper cleaning, click **Clean up system files**. This scans for larger Windows Update residuals and other administrative artifacts.
### Managing Browser and Application Cache
Browsers like Chrome, Firefox, and Edge store vast amounts of data (images, scripts, cookies) to speed up web browsing. Over time, this cache grows into gigabytes of data.
* **Browser Clean:** Press `Ctrl + Shift + Delete` within your browser. Select "All time" and check boxes for Cached images and files, Cookies, and History. Confirm the action.
* **Temp Folder Clear:** Sometimes Windows stores session-specific temp files that Storage Sense misses. Press `Win + R`, type `%temp%`, and press Enter. Select all files (`Ctrl + A`) and delete them. Skip any files that are currently in use.
### File Analysis for Large Blobs
Sometimes, specific large files are hiding in plain sight.
* **Storage Advisor:** Use the **Files** menu in the Storage Settings page. It categorizes files by size. Check the **Apps & features** section to uninstall unused software directly from here.
* **External Drives:** Connect external USB drives and check for duplicate backups that might be occupying space unnecessarily.
Regular maintenance of disk space ensures that the logical layout of your drive remains optimized, preventing fragmentation issues that slow down read/write speeds.
---
## Optimize System Visuals and Power Options
While Windows 10 strives for a balance between aesthetics and functionality, certain visual features can drain system resources, especially on machines with older integrated graphics or limited RAM. Additionally, the default power management settings prioritize energy conservation over raw performance on laptops and some desktops.
### Adjusting Visual Effects for Performance
Windows uses transparency, shadows, and animations to create a polished look. While pleasing, these effects require GPU cycles.
1. **Open System Properties:** Right-click the **This PC** icon on your desktop or start menu, select **Properties**. Then click **Advanced system settings** on the right or in the sidebar.
2. **Performance Settings:** In the System Properties window, under the **Advanced** tab, click the **Settings...** button under the **Performance** header.
3. **Fine-Tune Visuals:** You will see two main options:
* **Adjust for best performance:** This turns off almost all animations. UI elements become static. This yields the fastest visual feedback but looks dated.
* **Custom:** A safer middle ground. Deselect specific items such as **Animate controls and elements inside windows**, **Show shadows under menus**, and **Fade or slide menus into view**.
4. **Apply Changes:** Click **Apply** and OK. Restart your computer to ensure changes stick.
Most modern users find that disabling only the heavy animation effects while keeping window titles sharp strikes the perfect balance.
### Configuring Power Plans
Your computer’s behavior regarding electricity dictates its performance ceiling. By default, Windows is often set to **Balanced**, which throttles CPU clock speeds to save battery or power.
#### Switching to High Performance Mode
1. **Control Panel Access:** Open the Control Panel and navigate to **Hardware and Sound > Power Options**.
2. **Select Plan:** Look for the **High performance** option. If it is missing, click **Show additional plans**.
3. **Change Plan Settings:** Hover over High Performance and click **Change plan settings**. Then click **Change advanced power settings**.
4. **Processor Power Management:** Expand this section. Set **Maximum processor state** to **100%** on both Battery and Plugged In settings. This ensures the CPU hits its maximum frequency whenever possible rather than idling at lower voltages.
5. **PCI Express Link State Power Management:** Set this to **Off** to prevent the system from powering down the PCIe bus (where your SSD/GPU sit) aggressively, which can cause stuttering.
> **Note for Laptop Users:** While switching to High Performance improves responsiveness, expect reduced battery life. It is recommended to enable this mode only when plugged into a power outlet.
### Background App Permissions
Modern UWP (Universal Windows Platform) apps can run silently in the background, downloading updates and refreshing tiles.
* Navigate to **Settings > Privacy > Background apps**.
* Toggle **Let apps run in the background** to Off globally, or manage individual switches. Stop non-essential apps like News, Weather, or Calculator from updating themselves constantly.
This combination of visual tweaks and power configuration shifts the weight from "looks good" to "runs fast," providing a noticeably snappier interface.
---
## Conclusion: Final Checklist and Hardware Recommendations
We have covered the fundamental software-level optimizations to combat Windows 10 sluggishness. However, every user’s situation is unique. Some systems may be slowed down by software conflicts, while others are simply reaching their physical hardware limit.
### Recap of Key Optimization Steps
To ensure you haven’t missed anything, review this final checklist:
* [ ] **Startup Apps:** Disabled all non-essential programs in Task Manager.
* [ ] **Storage:** Ran Disk Cleanup, cleared `%temp%` folder, and emptied Recycle Bin.
* [ ] **Storage Sense:** Enabled automatic cleanup of temporary files.
* [ ] **Visuals:** Turned off transparency and heavy animations in System Properties.
* [ ] **Power Plan:** Activated High Performance plan and maxed out processor states.
* [ ] **Updates:** Verified all Windows Updates and Driver updates are current.
* [ ] **Malware Scan:** Performed a full scan using Windows Defender or trusted antivirus.
### When Software Isn’t Enough: Hardware Upgrades
Despite rigorous optimization, if your PC still lags during heavy tasks like gaming, video editing, or opening multiple browser tabs, the issue may lie in your physical components.
#### 1. The Case for Solid State Drives (SSD)
If you are still using a traditional Hard Disk Drive (HDD) as your primary drive, upgrading to an SSD is the single most impactful upgrade you can make. HDDs rely on spinning platters and mechanical arms, making them slow at random read/write operations. An SSD uses flash memory, offering boot times measured in seconds rather than minutes and instantaneous app launches. If your budget allows, moving the OS to an NVMe SSD is the gold standard for restoration.
#### 2. Expanding Memory (RAM)
Windows 10 requires a minimum of 4GB RAM to function, but 8GB is the recommended minimum for comfortable multitasking. If you frequently use Chrome tabs, Slack, and Spotify simultaneously, your RAM might be hitting its ceiling. Upgrading to 16GB allows the system to cache more data actively, reducing reliance on the slower pagefile on your disk. Check your motherboard’s maximum supported memory before purchasing.
#### 3. Thermal Throttling
Sometimes performance drops because the CPU gets too hot. Dust buildup inside fans and thermal paste drying out can cause overheating. Opening your PC case to clean dust from fans and heat sinks, or repasting the CPU/GPU, can restore performance lost to thermal throttling.
### Final Thoughts
Optimizing your Windows 10 computer is an ongoing process, not a one-time fix. By integrating regular maintenance routines—such as weekly cleanup and quarterly driver updates—you can maintain peak performance for years. Whether you choose software tweaks or hardware upgrades, understanding the root cause of your slowdown empowers you to make informed decisions.
Remember, a fast computer isn’t just about raw speed; it’s about reliability and peace of mind. Take control of your machine today, reclaim your productivity, and enjoy a computing experience that keeps pace with your ambitions.
> **Disclaimer:** Always create a system restore point before making significant changes to your registry or disabling critical system services, as a precautionary measure against unexpected errors.
Comments

TechNoob
Can't find 'High Performance' power plan anywhere, is it hidden somewhere?
👍 20👎 0
LazyMike
This worked perfectly, thanks for saving me money on a new PC!
👍 23👎 0

CasualUser99
Does adjusting visuals affect battery life much?
👍 6👎 0

IT_Guy_Brian
Don't forget to check Task Manager > Startup for anything unsigned by Microsoft. That was my culprit.
👍 11👎 0

OldLappy
Tried all these steps but my 2013 Acer is still crawling. Thinking about buying an SSD.
👍 2👎 0

Sarah_Jones
Just freed up 25GB using the cleanup tool mentioned. Crazy how much junk accumulates.
👍 16👎 0
WinFan_01
Disabled a bunch of startup stuff, boot time is barely noticeable now!
👍 18👎 0